Showing posts with label Tips N Tricks. Show all posts

Dec 5, 2012

Update your Facebook Status with your own voice!!!

Now you can update your Facebook Status with your own voice dubbed in it its really fun to say some thing instead of writing that out. So there is an app which will help you to this its really FUN maybe you will love this follow the below steps to get to know more about this amazing app.

Follow the below steps to update your Facebook Status in your own voice .:

1. Go to this Application Called MyMic

2. Sign In and Click Allow button and wait for 5 sec.

3. Now click Start Recording Button

4. Press the Red Button to Start Recording

5. Now just last step is to share this voice message with your friends or update your status.

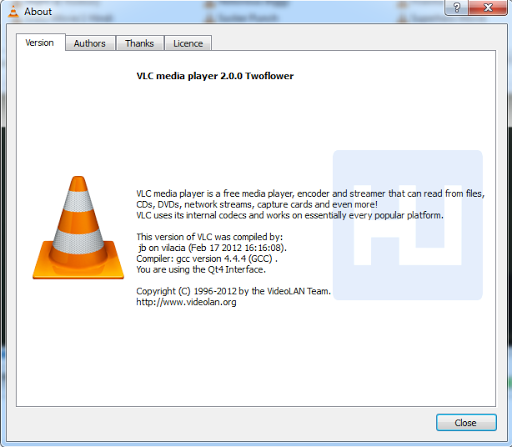
Vlc Media player is Now Twoflower (NEW VERSION OF VLC)

VLC Media Player  who has given a new dimension in viewing our movies and videos on our desktop has been updated to version 2.0 now called “Two Flower”. Well this is known as the major upgrade from them in the history and it adds many features + upgrading all the old features. Now all the information about the features is given right below you can check that out and than you go on their website links below to download this new version.

vlc%25255B20%25255D.png


Key Features of VLC 2.0 Two Flower :

1. Upgraded faster decoding on Multicore, GPU and Mobile Hardware.

2. More formats added, now many more videos can be handled by this version.

3. New rendering pipeline with higher quality subtitles.

4. Supports new devices and Blu-Ray Discs.

5. Interface redesigned, much more easier to use.

6. Many Bugs are fixed and this is known as the major upgrade in the history of VLC Player.

Downloading 2.0 Version :

Well if you might have noticed you cannot upgrade your already installed 1.1 VLC Media player to 2.0 as it will only show that its totally updated, so you need to grab it from their official website so now download it and than install, if you already have old version installed it will ask you to uninstall that @ the time of installation do that and than reinstall this version.

List of Websites That Host Pirated eBooks..

Here’s a complete list of websites that offer pirated ebooks and their respective share in the piracy pie. The book piracy share is calculated based on more than 53,000 book takedown notices sent between July and December 2009.

Website Hosting Pirated eBooks Share of book piracy

rapidshare.com 

 4shared.com 

esnips.com

uploading.com  

 mediafire.com          

hotfile.com                 

megaupload.com     

scribd.com                  

depositfiles.com       

filefactory.com          

ifile.it                             

wattpad.com              

 easy-share.com 

 ziddu.com                   

ioffer.com                    

sharingmatrix.com 

letitbit.net                   

docstoc.com                

kewlshare.com    

badongo.com 

midupload.com         

truly-free.org    

bitroad.net    

 rapidshare.de

 box.net 

This study does not attempt to address the issue of determining to what degree pirated books represent financial loss to the industry as it does not estimate how many free downloads might have otherwise resulted in a sale. In other words, this study does not attempt to answer the question, “How many of these pirated books would have been purchased legally if piracy was not an option?”

Share Computer internet Connection with your mobile or other Devices


With Connectify you can simply connect unlimited devices to your computers internet connection, pairing is really easy and can be done in few minutes using Wi-Fi. So if you are interested just follow below steps to get it installed and running on your computer.
123%25255B3%25255D.png?imgmax=800
 

Follow below steps :

1. Download Connectify Software for your PC.

2. Now after you have downloaded it, just install it in a normal way and after successful installation you will be promoted to Reboot your computer do that its important.

3. Now after Reboot it will automatically start and show window like in the image above, just change the name if you want too and add a 8 digits password.

4. Now choose the internet connection you wanna share I am sharing my MTS 3G Dongle internet connection with my iPhone.

5. So after you have chosen the connection, just pick up how you wanna share your connection the best one is Wi-Fi but if you don’t have than you can choose Bluetooth or any other mentioned.

6. Now just click on Start Hotspot and you Hotspot is ready to be searched and to be connected, just open your mobile Wi-Fi settings menu and search for available connection and you will see the above name you have mentioned displaying just hit that and enter the 8 digits password you kept.

7. Now you are connected with your Internet Connection, so now you can browse or do anything you wanted to do, well you can see how many people are connected in the second window in the above image, that’s just for keeping track on people using your Wi-Fi connection.
So now enjoy Internet Connection Tethering for free and easily on your any handheld devices equipped with Wi-Fi, well that’s it folks if you like this tutorial than please share it with your friends that might make us more strong.

How to block Adult/Porn Sites on your Computer ?

HOW TO KEEP AWAY YOUr Children fron Adult sites.
You don’t have be a tech-savvy person to implement any of the following stuff on your home computer(s) and all the software tools / services discussed here are available for free via the Internet.
Block Adult Sites Automatically

Since you don’t want kids to accidentally see any of sites that contain adult content, an easy option for blocking such sites is OpenDNS.
You don’t have to download or install any software – just go to www.opendns.com/start in any Internet browser,
choose the “Computer” option (let’s keep it simple) and follow the instructions on the screen.
Once your computer is configured with OpenDNS, go to Dashboard - > Settings and set the Filtering level to either Moderate or High.
Now whenever your kid mistakenly types a URL of some adult site in the browser
(e.g. whitehouse.com instead of whitehouse.gov) or clicks a link that may be pointing to an inappropriate site,
the OpenDNS filters will match the address of that site against their own database of adults sites and if there’s a match, the underlying web page won’t be displayed on the child’s computer.
Prevent clicks on Malicious Sites When you perform a search on Google or other search engines,
there is a probability that i'll share in my next post soon.

Block Selected Websites (like IMs or Social sites)

The filtering option in OpenDNS is great for blocking an entire category of websites on your computer but if you are looking to block only selected sites
(e.g. Facebook.com or MySpace.com)
because your kids are too young to waste time on these sites,
here’s a tip.
Run the Hostsman software (it’s a freeware for Windows) and press Ctrl+O to open the hosts file editor.
Click the “Add” icon and type the URLs of all the websites that you want to block on the child’s computer.
Hit Save and close the hostsman application.
None of the blocked sites will ever open in any of the browsers installed on your child’s computer.
untill its in hostaman list.
i hope this this info will help you to keep children safe.

How to turn your Home Computer Into a Web Server?

        Lets Say you have music MP3s, documents and other important files on the hard drive of your home computer.
If you turn this home computer into a web server, you will be able to access all these files from office or any other Internet connected machine including your mobile phone.
or You have some personal photographs that you want to share with other family members.
You can either upload these pictures online to a site like Flickr or better still,
just convert the computer into a web server.
Now you can connect the camera to the computer, transfer the digital pictures to some designated folder and they’ll instantly become available to your friends and family anywhere in the world.
Although you want to host a website on the internet but the web hosting jargon like FTP, DNS, etc. is way too complex for you.
The workaround therefore is that you setup a web server on your home computer (it’s easy) and then host a website in seconds without spending a single penny on external web hosting services.

here’s how you can convert your Windows, Mac or Linux PC into a web server in less than two minutes – no technical knowledge required.


Go to labs.opera.com, download the Opera Unite software and install it.
Congratulations, you are now running a web server on your machine and just need another minute to configure local file folders that you want to share with others over the internet.

Start the Opera Web browser (yes, that’s also you web server now) and enable the Opera Unite service from the lower left corner.
Now double click the File Sharing link and select the folder whose content you want to share on the web.
Any file or folder inside this folder can now be accessed over the internet – you can either use a public URL or specify a password for private sharing.
Opera Unite looks pretty useful but there are other services around that can also do pretty similar stuff.
For instance, both Purple Nova and Dekoh Dekstop enable users share content on the Internet directly from the hard drive without having to upload it anywhere.
NOTE: It’s important to note that your computer must be in running state and also connected to the Internet for others to download files and web pages since Opera Unite streams content directly from your machine – it doesn’t upload or caches anything to its own servers.

How to Change Removable Disk Default icon (including windows 7)..

Thanks for visiting us from http://hacktheworld.mywapblog.com/simple-registry-hack-to-change-your-remo.xhtml

Feature Top Posts

How to Change Removable Disk Default icon (including windows 7)

Posted by aamir khan on Monday, July 9, 2012
HI, guys this is Aamir Sorry for posting too late actually i was busy
But Now i am free and here 4u...

so today i am going to tell you a simple registry hack to change your Removable disk Default icon to your
desire icon.........
this Icon appear when you will plug-in your usb or Micro SD card in your PC....
check below my Removable Disk Icon that i have changed

changed icon


So Lets Start the work....
Go to >Run Type Regedit.exe

Now Locate the Shell Icons key in Local Machine by Going

[HKEY_LOCAL_MACHINE\SOFTWARE\Microsoft\Windows\CurrentVersion\Explorer\Shell Icons] 


Note:- If YOu are Using Windows 7 You Might not be able to locate shell icons but Don't worry just Right Click on Explorer and Create Your Own One


OK After Creating A new Key(Shell Icons) Look Right Side
Right-Click In Blank Area And Create a New String Value
And Fill 7 in Value name
And SHELL32.dll,243  (you can also type a full path of your icon: like "C:\my-icon.ico)

string name and value


Now Press F5 and plug-in your usb Walllaaaaaah!
Your Icon Changed
Your Final Look Will be Like This
Usb Final view


How To Make Bootable Pen Drive Without Any Software?

ISN'T AWESOME TO FORMAT WITH PEN DRIVE! THIS TUTORIAL IS 100% TESTED & VERIFIED BY MYSELF!
THE FIRST THING YOU HAVE TO CHECK THAT YOUR COMPUTER SUPPORTS THE USB BOOTING! IF NOT THEN YOU WILL NOT ABLE TO INSTALL IT FROM USB PEN DRIVE & INSTALL WINDOWS 7! 

THE SECOND THING, YOU JUST NEED A WINDOWS 7 INSTALLER DVD WITH A COMPUTER HAVING WINDOWS  OS!
THE FOLLOWING STEPS SHOWS THAT THE TUTORIAL...
STEP 1:
OPEN COMMAND PROMPT(cmd)..PRESS WINDOWS BUTTON + R (IT WILL OPEN RUN IN POP-UP WINDOWS) AND TYPE "CMD" & PRESS OK! A BLACK WINDOWS WILL APPEAR WITH C:\users\YOURNAME. THEN TYPE " cd\ " THERE.& THIS SCREEN WILL APPEAR...
postpic1.jpg

STEP 2:
TYPE "diskpart"
RUN DISK PART UTILITIES FROM THE COMMAND PROMPT. IT WILL OPEN A NEW POPUP WINDOWS i.e DISKPART LIKE THIS:


postpic2.jpg

postpic3.jpg

STEP 3:
INSERT YOUR PEN DRIVE IN ANY USB PORT & TYPE "list disk" IN DISKPART WINDOWS AS SHOWN!

IT WILL DETECT YOUR PEN DRIVE & SHOWS ALL THE STORAGE DEVICES AVAILABLE!
**NOTE:-1. YOUR PEN DRIVE MUST HAVE 4GB OR MORE THAN THAT!

2. THE NAME OF THE PEN DRIVE WILL NOT DISPLAY.. YOU WILL HAVE TO IDENTIFY IT BY SEEING ITS SIZE! IN THE SNAP THE DISK 2 IS OUR USB PEN DRIVE..IT MAY BE DISK 1 OR DISK 4 OR ANY OTHER FOR YOURS!
postpic4.jpg

STEP 4:
TYPE "select disk 2" (IF YOUR PEN DRIVE IS DISK 2 AS IDENTIFIED BY ABOVE PROCEDURE)
& THEN TYPE "detail disk"
THE SELECT DISK WILL SELECT YOUR USB PEN DRIVE..! & DETAIL DISK WILL SHOW THE DETAIL OF YOUR PENDRIVE..!
**NOTE: CHECK WHETHER YOU CHOOSE YOUR EXACT PEN DRIVE BY SEEING "TYPE- REMOVABLE" & SIZE OF YOUR PEN DRIVE.
postpic5.jpg

STEP 5:
NOW THE REAL THING BEGINS!
Type these commands as given and match with the pic given
clean
create partition primary
select partition 1
active
format fs=fat32

**note:- dont make any change in any of the the command! JUST TYPE IT 1 BY 1!
NOW TAKE REST..IT WILL TAKE SOME TIME TO MAKE YOUR PEN DRIVE  READY! ACTUALLY IT WILL FORMAT IT!

postpic6.jpg

STEP- 6:
WHEN COMPLETED TYPE "assign"
and type "exit".
postpic7.jpg


STEP 7:
AFTER EXITING FROM HERE! INSERT YOUR WINDOWS 7 INSTALLATION DISK IN DVD DRIVER OR IF YOU HAVE .iso FILE OF THE WINDOWS MOUNT IT USING IMGBURN OR POWER ISO! NOW COPY ALL THE CONTENT OF THE DVD BY PRESSING CTRL+A (SELECT ALL) & COPY IT BY PRESSING CTRL+C(COPY).

NOW OPEN PEN DRIVE & PASTE IT BY PRESSING CTRL+V(PASTE)

WHEN THE COPY IS COMPLETED YOUR PEN DRIVE IS READY! REMOVE IT SAFELY! NOW ITS BOOTABLE PEN DRIVE!& FORMAT YOUR PC WITHIN 10 MINUTES! smile

THIS TUTORIAL IS CHECKED AND VERIFIED & 100% WORKING!


I Hope You Like The Tutorial.......Keep Visit....☺

Nov 1, 2012

Post Birthday Wishes on Facebook Walls of Friends......


Birthdays come and birthdays go.And more often than not we miss wishing our friends. This is especially true of our online network of friends too.One thing you can do is an automated birthday wishes messages on facebook. All these days facebook shows the birthday notice of your friends on your facebook homepage. You need to manually go to their walls and wish them but now this task done by the facebook birthday app. You can send automated birthday wishes.

Auto post Birthday wishes with Autobudder.

Autobudder is an facebook app that helps you to automatically post birthday wishes on the walls of your facebook friends with customized messages from you, at sharp 12, before anyone can. Its hassle free, doubles as a birthday calendar, and at times, just helps maintain those social commitments

How to use AutoBudder ?
  • First log in to your facebook account.
  • Go to http://facebook.com/autobudder
  • Click ‘go to app’ button.
  • Click ‘Allow’ to grant access to the application so that it can collect all the birthday dates of your friends
  • Now in the application, click ‘Set common message!!’
  • You can set custom messages or just allow the default birthday wish message from autobudder.
  • The application displays how the message will appear on wall of your friend.
  • You can also choose to ignore wishing some of your friends by clicking the ignore against your friend’s name.
Now you can set the time zone from the options tab at the top. So that you can set the birthday wish to post exactly at 12 clock. You can enable/disable greeting cards with the birthday message.


Auto post birthday wishes with birthdayFB.

BirthdayFB is a site which helps you to automatically posts birthday wishes on the walls of your Facebook friends. Here's a screenshort from birthdayFB website.


How to Use birthdayFB

  • First login into your facebook profile.
  • Go to site BirthdayFB and lets connect with facebook.
  • Click allow to grant access the application.
  • Click on the tiny drop down and select Write Message for sending a birthday wish to a selected friend. You can also go into the Write Messages section from the top toolbar to compose your messages.
  • Choose your birthday greetings or write yourself.
  • Go to preferences  and choose your time slot according you.
  • That's all, when the day come your friend automatically received a message

How to Check if an Email Address is Valid or Not


  • Spam filters of popular email services like Gmail,Yahoo are very efficient and they keep a lot of junk emails out of your inbox.Still there are some sophiscated techniques available using which hackers bypass these spam filters.Emails are the prominent method used in phishing scams.

  • There are various free online services that allows you to send anonymous emails.Hackers can effortlessly create their own Anonymous Email service by simply uploading email PHP script to their servers.If you receive a suspicious email you can check whether that email id exists or it is fake.

  • Email address Checker is a free third party service. This checking tool connects to the mail server and checks whether the email exists. For valid email addresses, you can view additional intelligence including pictures, blog and local searches.


                                     How to verify an Email Address is Valid or Not:-

                                     Just go to the Email address Checker website.

http://tools.email-checker.com/

    In the Email Address field give the email address which you want to verify and click on check button.
    In the lower field you will see your result. In this example I had given two email address as you can see there will be a Tick Mark sign which is valid address and there will be a cross sign which is invalid email address.

How to bypass sms verificaton of any website | How to recieve online messages


Hey guyzz this is an awesome trick to make emails by using a fake number .There are various website like google,youtube etc that ask for sms verification before registeration . Verification Bypass means creating gmail account without SMS verification code that is generated by Google Systems to enforce users to enter their mobile numbers  and receive the verification code. As users receive Google verification code, they have to enter it on the submission form and that is the only way to create email accounts . Unfortunately, your mobile  is only valid for only a few of Gmail accounts. So when you try to put same mobile number more than allowed number of times, Google System restricts you and you cant create more gmail accounts.


I know you are just too frustrated with the SMS Verification code appearing again and again, because it never lets you create gmail account as many as you want. Why don't you find a way to bypass gmail verification code that actually works?


How to do it?


1.   Visit  Here

2.   Copy one of the two number mentioned below website / numbers change after 24 hours and put in the fields where they are asking for sms registration


3.   Then simple go back to here and click the number u have selected there u will find your code sent by google, youtube or other website.


Key features of Revieve-sms-online r useful  for:

1.Getting a message when you want to keep your real phone number to yourself. When your ex-wife wants to send you a text message.
2.Your phone has stopped working. One of the children that assembled the phone in China made a mistake.
3.You only have access to the web because the NWO has disconnected you from the phone system.
You don't have a phone because you are living off the grid and don't carry a trendy tracking and profiling device.

NOTE: Use this at your own risk as there is no 100% guarntee of this trick your
vericfication code will be visible to every one so be aware. Only for educational purpose.

HOW TO KNOW IF YOU ARE INFECTED OR NOT WITH A KEYLOGGER OR RAT??

In this post i am going to show you how to find out when you are infected with a RAT or Keylogger, without using any complex tools. Now i believe most of you might know that you need to have an internet connection to make a RAT or a Keylogger work, which would mean, if you are not connected to internet, you don't have to worry about being infected with RAT or Keylogger. Ok, so for those who have internet connection and think they are being infected with a Trojan, here is a little guide that can solve your problem.

1. Now every program has their own process which can be seen on task manager. So the first thing to do is to find out which process the Trojan is being attached to. If you see some unknown process search that on google. A good hacker will always makes sure he hides its process with a Windows based Process, for eg. svchost.exe or something like that.

2. If you cant find, then the next thing you can do is use cmd (to open cmd prompt, Click on Start--->Accessories-->Command prompt).

3. Once Command Prompt is opened, use this command: netstat -an |find /i "listening"

Note: The NETSTAT command will show you whatever ports are open or in use, but it is NOT a port scanning tool!
Now we wonder What this Command does? This command will show all the opening ports. Now check for any unknown port.


4. You can skip step 3 if you want, and can do this instead.
Open command prompt and type netstat -b

Now this command will show you the active connections with the process with their PID (Process Identifier) and also the packets.
Look out for SYN Packets and the Foreign address its been connecting with , check the process its been associated with, check the ports also. If you find that its connecting to some unknown ports, then you can say you have been backdoored.

5. Go to your task manager. On the top of it, click on View---> select Column---> Tick on PID (Process Identifier).
Match the suspicious Process with the Processes In task manager, check PID also.

Now most of the RATs resides on Start up. How to delete them from start up?

a) Go to regedit ---> HKLM\Software\Microsoft\Windows\Current version\Run
On the Right hand side, check for the process name which you find on step 4. if its not their. Check at

HKCU\Software\Microsoft\Windows\Current Version\Run
OR
Open RUN & type start msconfig. Go to Startup tab, you can check the startup process there.

Serial World - A serial key collection

If you are fed up with searching serial numbers of games and software one by one..

then its time for you to take this precious software....


download it from here